Pages

Showing posts with label DIY. Show all posts

MyMomShops Giveaway: The Little Experience


My kids and I stayed with my best friend and her family (her husband and three children ages 4, 6, and 8) when we travelled to Boston last month for my college reunion. I wanted to bring some fun, crafty activities for our total of five kids to work on together, but one that would not make a total mess. I decided on the kits from The Little Experience which I had spotted at last spring's Bubble show. The Little Experience is British import (now available Stateside) offering a range of adorable all-inclusive craft kits for kids. Each package includes all you need (ex: paint brushes, fabric, scissors) to make the craft from start to finish. Some of them even have packaging that unfolds to become a backdrop or set for the craft. There are "girly" projects, boy-friendly projects, and projects that appeal to all (grown-ups, too...I kinda wished I had bought one for myself). Ideally, they are for children ages 5 and up, but younger kids can get crafty too with the help of a big sib or parent. These also make unique party favors, depending on your budget.

Cattiwampus, an online kids' boutique I've mentioned here before, sells some of The Little Experience's best-selling kits including Build Your Own Rocket ($7.50), Enchanted Castle ($15.00), and Stitch-It Dolly Kit ($15.00), all shown above.

Cattiwampus is giving away two kits by The Little Experience for this week's giveaway (each winner gets to pick their kit of choice). And everyone else will get to enjoy a 15% storewide discount with code "COOL" (the code does not apply to sale items, except summer dresses- hooray!)

Win it! 2 MyMomShops reader will each win a The Little Experience kit of choice (a $7.50 or $15 retail value) from Cattiwampus. Here are the contest rules:

1) To enter, please comment on THIS post (click on "comments" below), indicating which kit you'd choose (click here for all of the choices).
2) Post your comment by 11:59pm EST Sunday, July 19th. One entry per person, please. US addresses only.
3) Two winners will be chosen at random and announced on Monday morning, July 20th.
4) NOTE: If you wish to be contacted by e-mail if you win, please include your e-mail address in your comment. Otherwise you must check back on Monday to see if you won. Unclaimed prizes are forfeited after 72 hours.

Good luck!

How to Print Invitations from a Digital File

Remember I asked you for opinions about Batman party invitations for S's 5th birthday? Thanks for all of your input! Of course, I ended up choosing yet another invitation, from the Etsy shop My Pretty Printables. But I always get a little nervous about ordering a digital design that I'll have to print myself, and from my own Google searches it seems that others are, too. So I thought I'd walk you through the process.

First, I bought a customized version of this Superhero II Birthday Party Invitation for $15. I liked the Pop Art-style and the fact that I could customize S's eye color and initial.


Once I received the finished design, I uploaded it to Snapfish, where they offer cardstock stationery cards (I didn't want floppy photo paper for the invites). I needed a full-photo, vertically oriented 5 x 7 card for my design, which I uploaded as if it were a photo itself. They arrived very quickly from Snapfish. Another site where you can do a similar upload is Vista Print, but they didn't have the vertical 5 x 7 layout that I needed.


My Snapfish invitations arrived with matching white envelopes, but I wanted something a little more colorful, so I ordered solid color 5 x 7 envelopes from a site called Invitation Outlet.


I also ordered these sheets of Superhero Stickers ($1.99 for 4 sheets) from Birthday Express so I could decorate the envelopes, too.


And for the finishing touch, I used Neon Celebrate! (Forever) Stamps ($.44 each) from USPS.com.

Easy peasy and they turned out so cute! I'm curious...what do you generally do for your children's birthday party invitations? Do you buy fill-in invites from a store? Order personalized invitations online? Or are you an Evite person? Let me know in the comments.

Our Art Gallery

I've curated several exhibitions in my previous life as an art history major/museum professional, but nothing has been more fun than creating a gallery of my children's artwork in their play area off our living room. I'd been meaning to do this for the longest time. While I am not quite Martha Stewart, I am pleased with how it turned out (and how little I spent (note: it's still a work in progress- there are blank spots left on purpose).


And closer up:


This is a portrait that R. made of me when she was four years old:


I centered the kids' artwork around this framed silhouette print of them (based on a photograph I provided), created by Le Papier Studio and price very reasonably at $20 (unframed). I framed it in a 9 x 11" natural wood Ribba frame ($7.99) from Ikea which included a mat.


For the kids' artwork I chose these Nyttja Frames from Ikea in different colors and sizes. A 2-pack of 5 x 7 frames cost just $3.99. I like that the fronts are clear plastic rather than glass; it's safer and more kid-friendly.

I'm very pleased with the results and look forward to adding more artwork!

From the Archives: Mom's Sticker Book, Redux

Editor's note: All weekend long, I'll be posting some of my favorite finds from the blog's archives. This post about how to make your child a retro-style sticker book is one of the most visited posts at the blog. The sticker book idea is perfect as a year-round gift. Enjoy!

Over a year ago, my daughter R. (then 5 years old) and my niece A. (then 6 years old) found my old grade-school stickerbook- a beat up, stuffed-to-the-gills spiral notebook that I used to house my precious collection of "smelly stickers", Smurf stickers, and very un-PC Garbage Pail Kids stickers. There are even a few errant Ronald Reagan stickers in there (in fourth grade, I was not yet a Democrat). The year was 1982, and with no DS or Wii to occupy my time, I was a sheltered nine-year-old who methodically added my latest stickers to my notebook. The kids were quite taken with this retro object- it was like they had found something from the Smithsonian. They asked if they could start putting their own sticker collections into books.


So for Hanukkah last year, I gave my kids and each of their seven cousins (ages toddler through 8 years) the materials to make their very own sticker books, 21st-century style. Each child got a plain spiral notebook plus a ziploc full of stickers I had chosen especially for him or her (plus a handful of vintage Smelly Stickers- which I snagged on Ebay- and some Obama/Biden stickers to mark their recent victory). This stupendously simple and affordable gift was a hit. R. spent all of the next 12 months filling hers with various stickers from our travels, and sometimes wrote in little "stories" in the margin. She has just one page left and is ready for her next volume.


This Hanukkah I am making the next installment of the present a bit more "special" by giving each kid their own personalized spiral notebook from Frecklebox.com (assorted designs, $9.95 each)


And they'll each get new stickers from Oriental Trading (try out the Super Sticker Assortment for $14.99)

Plus the requisite Stinky Stickers ($11.99 for a variety pack) from Amazon.com.

I highly recommend this as a simple, affordable, and fun holiday gift for kids- and something to help them make a "collection" of their own that their children will admire someday (and will say, Obama who?). Do you have other holiday gift ideas that involve helping children start- or continue- a collection of something?

Kids' Wall Art Gallery, c. 2011


Here is a newer photo of the wall art gallery I created 2 years ago. Like most moms, I fall wayyyy behind on updating what's inside the frames, but I have managed to make a few recent changes. I look forward to seeing the progression away from pure "scribble scrabble" (as the kids call it) over the years!

From the Archives: Kids' Wall Art Gallery

Editor's Note: I first published this post in 2009, and it is one of the most searched/visited posts at the blog. I have added & changed some artwork since then (I'll post an updated photo later) but otherwise it's the same. It's still centered around a fabulous silhouette print of my kids from two years ago. That print was created by the talented Vana Chupp of Le Papier Designs, whom I was so happy to finally meet in person at the National Stationery Show last week. I love how the collection of artwork by the kids "grows" around this silhouette of them at a younger age!

I've curated several exhibitions in my previous life as an art history major/museum professional, but nothing has been more fun than creating a gallery of my children's artwork in their play area off our living room. I'd been meaning to do this for the longest time. While I am not quite Martha Stewart, I am pleased with how it turned out (and how little I spent (note: it's still a work in progress- there are blank spots left on purpose).


And closer up:


This is a portrait that R. made of me when she was four years old:


I centered the kids' artwork around this framed silhouette print of them (based on a photograph I provided), created by Le Papier Studio and price very reasonably at $20 (unframed). I framed it in a 9 x 11" natural wood Ribba frame ($7.99) from Ikea which included a mat.


For the kids' artwork I chose these Nyttja Frames from Ikea in different colors and sizes. A 2-pack of 5 x 7 frames cost just $3.99. I like that the fronts are clear plastic rather than glass; it's safer and more kid-friendly.

I'm very pleased with the results and look forward to adding more artwork!

MyMomShops Giveaway: Pottery Barn Kids First Year Frame

A few hours left to enter this giveaway! Deadline is tonight ( Sunday, April 10th) at midnight EST.


If you've read this blog for awhile you know that I love 
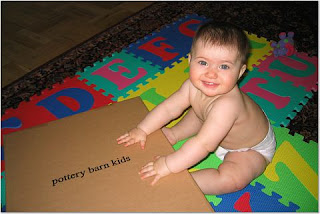
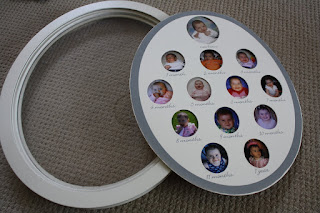
baby keepsake gifts, particularly those that become part of your home for years to come. When R. was about 9 months old, I received this Pottery Barn Kids 
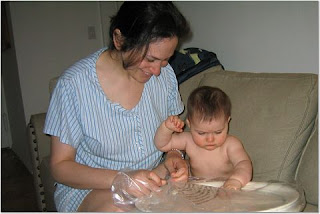
Oval First Year Frame. I had spotted it in the catalog and put in a request for it as my 1st Mother's Day gift from my husband and baby. Here is chubby baby R. helping me open my gift:


I immediately set to work filling in R's frame up to age 9 months, and then completed it after she turned one. Three years later, I made the same frame for her little brother.

These frames are actually one of the first things moms comment on when they enter my kids' rooms. Without fail, they say something to the effect of "Oooooh! I love that!", followed by, wistfully, "I wish I knew how/could find the time to...do that for my child."

Today I'm going to tell you step-by-step just how easy it is to complete a Pottery Barn Kids First Years Frame for your little one. Plus, it will be extra easy for 5 lucky MyMomShops readers who will win their own First Year Frames from Pottery Barn Kids!

Here's what to do:

1) Get the frame as soon as possible. It doesn't matter if your child is a newborn, or 5 years old. I firmly believe it is never too late to make baby keepsakes (an exception: baby footprint kits. A giant foot doesn't have the same effect).

2) Start selecting pictures. This is the part that usually trips people up. My advice is *not* to choose the most "perfect" picture from each month where your baby is smiling angelically, but to choose the ones that on an emotional level you love the best because they really capture the spirit of your baby. Your child can be smiling, or crying, or making a cute infant scrunched face. It's about all those memorable moments during that fleeting first year, so go with your gut.

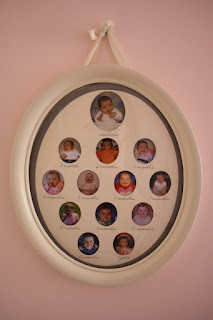
3) Figure out sizing. The frame is an oval which measures 14.5" x 17"; the oval photo openings on the First Year frame are about 3" tall for the newborn photo, and 2" tall for each monthly photo up to age 1. Sometimes it's hard to tell on your computer monitor how the sizing will work out. My best tip is to go ahead and order (via Shutterfly, or Kodak Gallery, or wherever you get your prints from) your favorite photos BOTH in wallet size and 4 x 6 size. That way, you won't be stuck with an image of Junior that is too-big or too-small for the photo openings. Give yourself some options--it is worth a few extra dollars.

4) Set aside an hour for this project. "What hour?" you laugh. Believe me, I know what you mean. Make the time late one night, or while your child is napping. Lay out the frame and your photos, and match up the photos to where you want them to appear inside the die-cut matting. I used small slivers of invisible scotch tape to "anchor" my photos to the reverse side of the matting--this way they won't shift around once you reassemble the frame and hang it up. Then put the frame back together and secure the back with the clips provided.


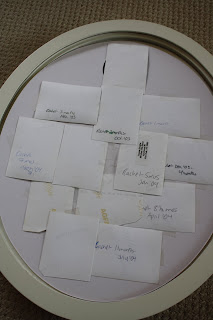
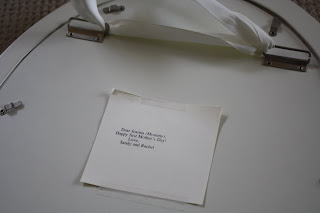
5) Attach the included white grosgrain ribbon (or not) to hang it on a wall hook. I left the ribbon on for R's version, for S's I opted to take it off (a bit less "girly"). And this is a detail I had forgotten about: I taped the gift card from my husband and daughter to the back of the frame. I often tape cards to the back of gifts, or inside books I've received...I'm sentimental like that. This one is particularly poignant for me.


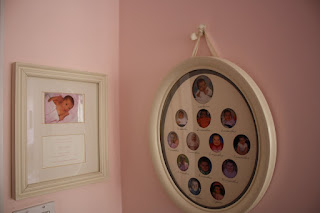
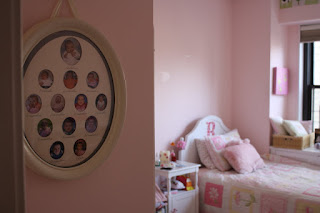
6) Now's the fun part...decide where to hang it (it is a chunky frame but just requires one wall hook). Be creative. Place it in an unexpected nook in your child's room. Or group it with other keepsakes.

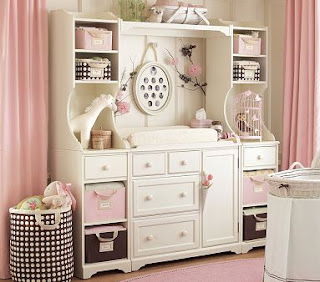
Here's how Pottery Barn Kids shows the First Year Frame on display. I don't know about you, but my daughter's first "nursery"--actually a walled-off dining alcove--never looked that good. But it's all about aspiring to a certain aesthetic, right?


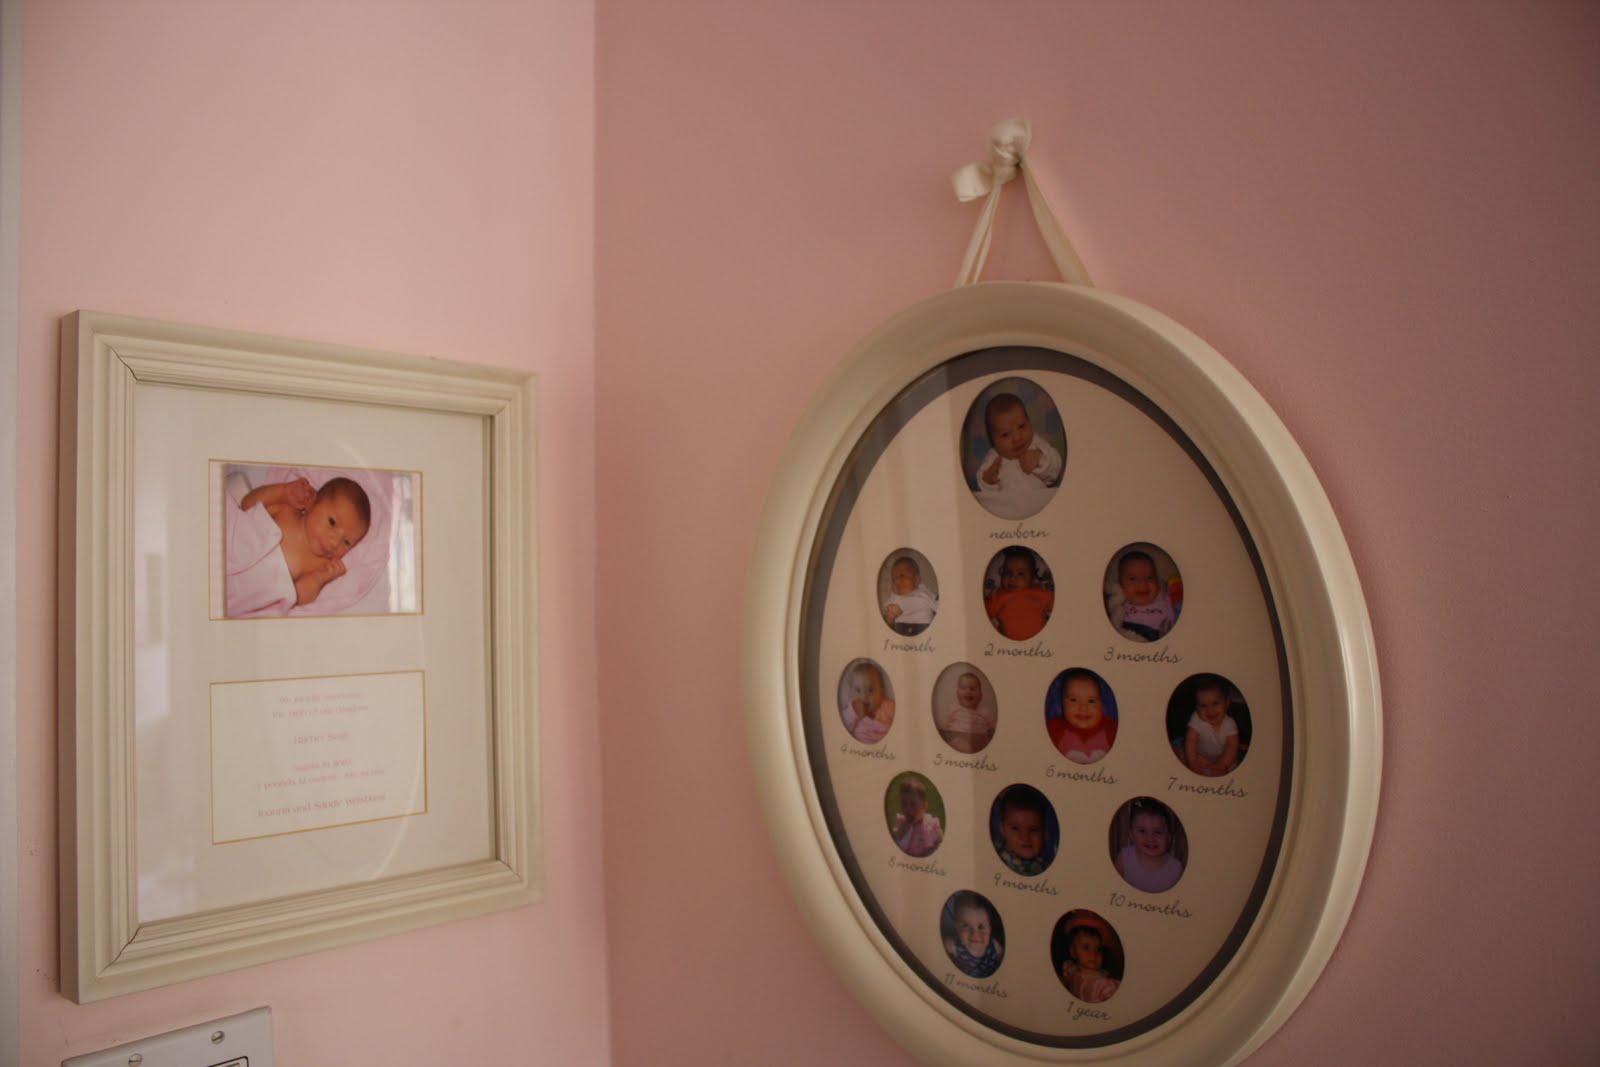
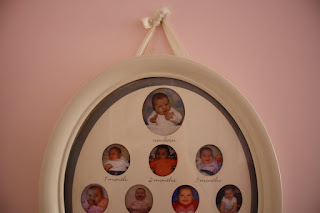
Here's how R's First Year Frame looks in her room. Not quite catalog material, but very pretty nonetheless, I'd say.


Pottery Barn Kids's First Year Frame costs $44 (online only at Pottery Barn Kids; not in-store) and shipping is free.


Win it! FIVE MyMomShops readers will each win a First Year Frame ($44) from Pottery Barn Kids. Here are the contest rules (they have changed a bit- please read carefully!) Winners will be chosen by Random.org and announced on Monday morning, April 11th.

1) Visit Pottery Barn Kids and then leave a comment here about your favorite baby gift (it does NOT have to be the First Year Frame). Leave your comment on THIS post (click on "comments" below).
2) Post your comment by 11:59pm EST on Sunday, April 10th.
3) You may leave up to 4 separate entries- 1 entry with a comment as described in #1, 1 entry indicating that you "like" Pottery Barn Kids on Facebook, 1 entry indicating that you follow Pottery Barn Kids on Twitter (please provide your Twitter handle), and 1 entry indicating that you follow MyMomShops on Twitter (please provide your Twitter handle).
4) Five winners will be chosen at random (using Random.org) and announced on Monday morning, April 11th.
5) NOTE: If you wish to be contacted by e-mail if you win, please include your e-mail address in your comment. Otherwise you must check back on Monday, April 11th by 10am. If the prize is NOT claimed within 48 hours, the next random winner (using Random.org) will be contacted.

GOOD LUCK!

I Can Do That!

This original Do It Yourself Photo Block Kit from Photojojo.com actually looks like something I *can* do myself (I am not as crafty as I'd like to be). The all-inclusive kit includes everything you need to create two sets of photo blocks right at your own kitchen table. All you need is scissors and a ruler, and your own favorite 4" x 6" photos. I don't know about your kids, but mine would flip for blocks featuring their faces. Each kit costs $25 at Photojojo.com.